Are you looking for ways to add a personal touch to your home decor? Look no further! In this article, we will explore the world of easy-to-make DIY home crafts that anyone can try. From simple wall art to repurposed furniture, these crafts are not only fun to create but also a cost-effective way to spruce up your living space. So grab your craft supplies and get ready to unleash your creative side!
DIY Home Crafts with Fabric
No-Sew Fabric Coasters
No-Sew Fabric Coasters are a fun and practical craft that you can easily make at home. All you need is some fabric of your choice, scissors, and a hot glue gun. Start by cutting your fabric into desired shapes and sizes. You can make them round, square, or even in fun shapes like hearts or stars. Next, fold the edges of each fabric piece and secure them with hot glue to create a clean hem. Once you have your fabric pieces ready, simply glue them onto a cork or foam backing to complete your coasters. These DIY fabric coasters are not only stylish but also great for protecting your furniture surfaces.
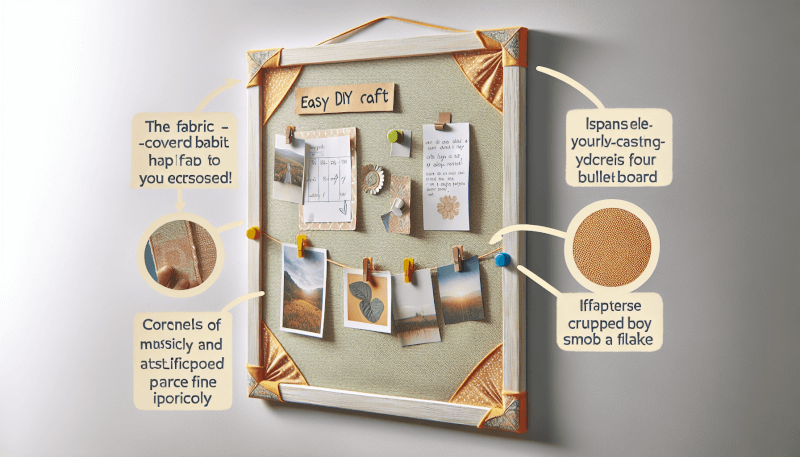
Fabric Covered Bulletin Board
A fabric-covered bulletin board is a great way to add some color and organization to your space. Start by selecting a fabric that matches your room’s decor. Next, remove any previous covering from the bulletin board and clean the surface. Lay your chosen fabric on a flat surface and place the bulletin board face down on top of it. Pull the edges of the fabric tightly around the board and secure them with staples or push pins. Trim any excess fabric and fold the corners neatly. Finally, hang your fabric-covered bulletin board on the wall and use it to display important notes, pictures, or even as a vision board.
DIY Fabric Wall Art
If you’re looking to add a personal touch to your walls, DIY fabric wall art is the way to go. Start by selecting a fabric that matches your room’s color scheme or theme. Cut the fabric to fit the size of the canvas or wooden frame you’ll be using. Next, stretch the fabric tightly around the frame or canvas and secure it with staples or glue. If using a frame, you can also add some padding, like foam or batting, to give your wall art a three-dimensional effect. Once the fabric is secure, you can get creative by adding embellishments like buttons, beads, or even embroidery. Hang your fabric wall art in your desired location and admire your personalized masterpiece.
DIY Home Crafts with Paper
Origami Flower Bouquet
Origami, the art of paper folding, offers endless possibilities for DIY home crafts. Create a beautiful origami flower bouquet by folding several origami flowers using colored paper. There are a wide variety of flower designs to choose from, such as roses, lilies, and tulips. Once you have folded your flowers, arrange them in a vase or wrap them with floral tape to create a stunning bouquet that will never wilt. This craft is not only enjoyable but also makes for a lovely decoration or gift.
Paper Garland
Paper garlands are a simple and versatile DIY home craft that can add a festive touch to any occasion. Choose different colored or patterned papers to match your desired theme. Cut the papers into strips or desired shapes, such as hearts or stars. For a classic garland, fold the strips accordion-style, creating a zig-zag pattern. Connect the ends of each strip using tape or glue, creating a chain of paper. Hang your garland on a wall, doorway, or even across a window to instantly brighten up your space.
Handmade Greeting Cards
There’s something special about receiving a handmade greeting card. Impress your friends and loved ones with personalized cards for any occasion. Start by choosing cardstock or colored paper as the base for your cards. Fold the paper in half to create the card shape. Then, let your creativity shine by using various techniques such as stamping, embossing, or even adding small embellishments like ribbons or buttons. Write a heartfelt message inside and surprise someone with a unique and thoughtful greeting card.
DIY Home Crafts with Mason Jars
Mason Jar Soap Dispenser
Transform an ordinary mason jar into a stylish soap dispenser with just a few simple steps. First, choose a mason jar with a lid that fits a soap dispenser pump. Drill a hole in the center of the lid, making sure it is wide enough for the pump to fit through. Place the pump through the hole and secure it tightly with glue or adhesive. Fill the mason jar with your favorite liquid soap and twist on the lid. Not only does this craft add a touch of rustic charm to your bathroom or kitchen, but it also provides a convenient way to dispense soap.
Mason Jar Herb Garden
Do you love fresh herbs but lack the space for a traditional garden? A mason jar herb garden is the perfect solution. Start by filling a mason jar with potting soil, leaving about an inch of space at the top. Plant herb seeds or small herb plants in the soil, following the instructions for each specific herb. Water your garden regularly and place it in a sunny spot. You can even label your jars by writing the name of each herb on small wooden sticks and sticking them in the soil. Not only will you have fresh herbs at your fingertips, but this DIY craft also adds a touch of greenery to your kitchen or windowsill.
Mason Jar Lanterns
Create a cozy and romantic atmosphere with DIY mason jar lanterns. Start by cleaning and drying your mason jars thoroughly. Choose a design for your lantern, such as wrapping the jar with twine or applying adhesive stencils. If desired, paint the outside of the jar with glass paint to add some color. Then, place a tea light or LED candle inside the jar and secure the lid tightly. You can hang your lanterns using rope or wire, or simply place them on a table or shelf. These mason jar lanterns are perfect for outdoor gatherings or for adding a warm glow to your indoor space.
DIY Home Crafts with Recycled Materials
Upcycled Glass Bottle Vases
Give your empty glass bottles a new lease on life by turning them into beautiful vases. Start by cleaning and removing any labels from the bottles. You can use clear bottles or paint them with glass paint for a pop of color. Once the bottles are dry, fill them with water and your favorite flowers. Arrange the vases on a windowsill, mantel, or as a centerpiece for a stunning, eco-friendly decoration.
CD Scratched Art
If you have a collection of scratched or outdated CDs lying around, don’t throw them away just yet. Turn them into unique works of art. Start by cleaning the CD thoroughly and removing any stubborn labels or residue. Place the CD on a protected surface and apply acrylic paint in various colors. Use a brush, sponge, or even your fingers to create interesting patterns and textures on the surface of the CD. Let the paint dry completely before displaying your CD art on a wall or as a decorative piece.
Newspaper Baskets
Turn old newspapers or magazines into environmentally-friendly and stylish baskets. Start by cutting the newspapers or magazines into long strips. Roll each strip tightly to create paper tubes. Use glue or tape to secure the ends of the tubes and create a base for your basket. Continue rolling and gluing the tubes together in a circular shape, gradually building up the sides of the basket. Once you reach the desired height, let the glue dry completely before using your newspaper basket for storage or as a unique home decor item.
DIY Home Crafts with Wood
Wooden Picture Frames
Give your favorite photos a special touch by creating your own wooden picture frames. Start by selecting a piece of wood that is the appropriate size and thickness for your frame. Cut the wood into four equal pieces, each slightly longer than the corresponding side of your photo. Sand the edges of the wood to create a smooth finish. Next, join the corners of the wood pieces together using wood glue or small nails. Once the glue is dry, stain or paint the frame to your desired color. Finally, place your photo in the frame and display it proudly on a shelf or wall.
Wooden Wall Shelves
Add stylish storage to your space with DIY wooden wall shelves. Start by selecting a piece of wood that matches your desired shelf size and style. Sand the edges and surfaces of the wood to create a smooth finish. Next, determine the desired location for your shelves and mark the wall accordingly. Secure metal brackets or wooden supports to the wall using screws or anchors, depending on the type of wall you have. Place the piece of wood on top of the brackets or supports and ensure it is level before securing it in place. You can leave the shelves natural or paint them to match your room’s decor.
Wooden Coasters
Protect your furniture in style with wooden coasters. Start by selecting a type of wood that is suitable for creating coasters, such as birch or cork. Cut the wood into evenly sized squares or circles, depending on your preference. Sand the edges and surfaces of the wood to create a smooth finish. If desired, you can also stain or paint the coasters to add some color or a personal touch. Place the wooden coasters on your coffee table, dining table, or anywhere you like to enjoy a refreshing beverage without worrying about damaging the surface.
DIY Home Crafts with Glass Bottles
Colorful Bottle Vases
Turn plain glass bottles into eye-catching vases with a splash of color. Start by cleaning and removing any labels from the bottles. Choose your favorite colors of glass paint or transparent glass stain. Pour a small amount of paint or stain into the bottle and swirl it around, making sure to cover the entire inner surface. Pour out any excess paint or stain and let the bottle dry completely. Once dry, you can add fresh or artificial flowers to your vibrant bottle vases to create a stunning centerpiece or display.
Bottle Decorative Lanterns
Create a magical atmosphere with DIY bottle decorative lanterns. Start by cleaning and removing any labels from the bottles. Choose a design for your lantern, such as painting the outside of the bottle with glass paint or applying adhesive stencils. If desired, you can also add decorative elements like beads, ribbons, or charms. Place an LED tea light or fairy lights inside the bottle and secure the lid tightly. You can hang your lanterns using rope or wire, or simply place them on a table or shelf. These bottle decorative lanterns are perfect for adding a touch of whimsy to any space.
Bottle Wind Chimes
Add a soothing and melodic touch to your outdoor space with DIY bottle wind chimes. Start by collecting a variety of glass bottles in different shapes and sizes. Clean and remove any labels from the bottles. Using a glass cutter or drill, carefully create holes in the bottom of each bottle. Thread a piece of twine or wire through each bottle and tie a secure knot at the top to hold them in place. Attach the bottles to a larger piece of wood or metal, ensuring they hang at varying heights. Hang your bottle wind chimes in a breezy area and enjoy the gentle music they create.
DIY Home Crafts with Paint
Painted Terra Cotta Pots
Transform plain terra cotta pots into vibrant and unique planters with a little bit of paint. Start by cleaning and drying the pots thoroughly. Choose acrylic or outdoor paint in your desired colors. Use a brush or sponge to apply the paint to the exterior of the pots, allowing each coat to dry before applying the next. Get creative by adding patterns, designs, or even stenciling words or images onto the pots. Once the paint is completely dry, seal it with a clear varnish to protect the design. Plant your favorite flowers or herbs in the painted pots and watch them thrive in their colorful homes.
Spray Painted Lampshade
Give an old or plain lampshade a modern and stylish makeover with spray paint. Start by covering the surrounding area with newspaper or a drop cloth to protect it from any overspray. Choose a color of spray paint that complements your room’s decor. Place the lampshade on a protected surface and apply the spray paint in even strokes, moving the can back and forth to ensure a smooth finish. Allow the paint to dry completely before handling or using the lampshade. Once dry, you’ll have a unique and eye-catching statement piece for your room.
Painted Mason Jars
Mason jars are incredibly versatile and make excellent DIY home crafts. Give them a fresh and colorful look by painting them. Start by thoroughly cleaning and drying the jars. Choose acrylic or glass paint in your desired colors. Apply the paint using a brush, sponge, or even by dipping the jars into a container of paint. Allow each coat to dry before applying additional coats, if needed. Get creative by adding patterns, designs, or even stenciling words or images onto the jars. Once the paint is completely dry, you can use your painted mason jars as vases, candle holders, or even as storage containers.
DIY Home Crafts with Yarn
Yarn Wrapped Flower Pots
Add a cozy and textured touch to your planters by wrapping them with yarn. Start by selecting a flower pot or container of your choice. Choose yarn in your desired color or colors. Secure one end of the yarn to the bottom of the pot with a small amount of glue or tape. Wrap the yarn tightly around the pot, ensuring each layer is close together. You can wrap the yarn in a uniform pattern or get creative with different designs like stripes or zig-zags. Once you reach the desired height, secure the end of the yarn with another small amount of glue or tape. Display your yarn-wrapped flower pots filled with your favorite plants for a unique and charming touch.
Pom-Pom Rug
Add a soft and playful touch to your floors with a DIY pom-pom rug. Start by creating pom-poms using yarn in different colors. You can use a pom-pom maker or make them by wrapping the yarn around a cardboard template and tying it tightly in the middle. Once you have a collection of pom-poms, you can either hand-sew or hot glue them onto a rug mat or non-slip rug pad. Arrange the pom-poms in a pattern or randomly for a fun and cozy rug that will brighten up any room.
Yarn Wall Hanging
Create a stunning statement piece for your walls with a DIY yarn wall hanging. Start by selecting a wooden dowel or branch to use as the base of your wall hanging. Choose yarn in various colors and textures that complement your room’s decor. Cut the yarn into equal lengths, twice the desired length of your wall hanging. Fold each piece of yarn in half and loop it through the wooden dowel, creating a lark’s head knot. Continue adding yarn until your desired width is achieved. Trim the ends of the yarn as desired to create a cohesive and balanced look. Hang your yarn wall hanging in a prominent place to add warmth and texture to your space.
DIY Home Crafts with Clay
Clay Jewelry Dish
Create a beautiful and functional clay jewelry dish to store your favorite pieces. Start by selecting polymer clay in your desired color or colors. Knead and soften the clay until it is pliable. Roll the clay into a ball and flatten it using a rolling pin or the palm of your hand. Use a round cookie cutter or a cup to cut a circle from the flattened clay. Using your fingers or small clay tools, create a shallow bowl shape in the center of the circle. If desired, you can also add textures or patterns to the surface of the dish. Bake the clay according to the manufacturer’s instructions to harden it. Once cooled, your clay jewelry dish is ready to hold your precious accessories.
Handmade Clay Coasters
Protect your tables in style with handmade clay coasters. Start by selecting polymer clay in your desired colors. Roll the clay into a ball and flatten it using a rolling pin or the palm of your hand until it is about ¼ inch thick. Using a round cookie cutter or a cup, cut out circles from the flattened clay. If desired, you can also add textures or patterns to the surface of the coasters using small clay tools or stamps. Transfer the clay circles onto a baking sheet and bake them according to the manufacturer’s instructions to harden them. Once cooled, your clay coasters are ready to use and will add a touch of creativity to your living space.
Clay Fridge Magnets
Make your own personalized clay fridge magnets to add a touch of whimsy to your kitchen. Start by selecting polymer clay in your desired colors. Knead and soften the clay until it is pliable. Roll the clay into small balls and flatten them using a rolling pin or the palm of your hand until they are about ¼ inch thick. Use small clay tools or cookie cutters to create different shapes and designs. Add texture or details to the clay using tools or stamps. Transfer the clay shapes onto a baking sheet and bake them according to the manufacturer’s instructions to harden them. Once cooled, attach small magnets to the back of each clay shape using strong adhesive. Now you can proudly display your handmade clay magnets on your fridge, adding a personal touch to your kitchen decor.
DIY Home Crafts with Seashells
Seashell Picture Frame
Bring a piece of the beach into your home with a seashell picture frame. Start by choosing a plain picture frame in the size of your choice. Collect a variety of seashells and clean them thoroughly. Arrange the seashells on the frame, experimenting with different shapes and sizes until you find a design you like. Once you’re happy with the arrangement, use a hot glue gun to attach the seashells to the frame. Let the glue dry completely before inserting your favorite photo and displaying your seashell picture frame as a reminder of sunny days by the shore.
Seashell Candle Holder
Create a calming and beachy ambiance with a DIY seashell candle holder. Start by selecting a glass candle holder or a small glass jar. Collect an assortment of seashells and clean them thoroughly. Use a hot glue gun to attach the seashells to the outside of the glass, arranging them in any pattern or design you desire. You can create a border of seashells at the rim of the glass or cover the entire surface, the choice is yours. Place a votive candle or tea light inside the glass, light it up, and enjoy the soothing flickering glow that shines through the seashells.
Seashell Wind Chimes
Bring the serene sound of the ocean breeze into your outdoor space with a DIY seashell wind chime. Start by collecting an assortment of seashells, driftwood, and small decorative charms or beads. Clean the seashells thoroughly and let them dry. Using string or fishing line, tie each seashell to a length of driftwood or a larger seashell at varying heights. Add the decorative charms or beads to the strings at different intervals to add visual interest. Attach a string or metal loop to the top of the driftwood or large seashell to hang the wind chime. Hang your seashell wind chime in a breezy area and enjoy the soothing sounds of the shells tinkling together.
In conclusion, DIY home crafts offer a fun and creative way to personalize your living space. From fabric coasters to clay jewelry dishes, there are endless possibilities for adding a personal touch to your home. Whether you’re repurposing materials or starting from scratch, these DIY crafts allow you to showcase your creativity and create unique, handmade pieces that will fill your space with charm and style. So put on your crafting hat, gather your materials, and let your imagination run wild as you embark on these easy-to-make DIY home crafts.
