So you’ve been longing for those cozy nights around a crackling fire, but the thought of a complicated construction project has held you back. Well, worry no more! In this article, we will show you just how easy it is to create your very own DIY fire pit right in your backyard. With a few simple steps and some basic materials, you’ll be roasting marshmallows and enjoying the warm glow of your very own outdoor oasis in no time. Get ready to turn your outdoor space into a haven of relaxation and entertainment with your very own homemade fire pit.
Choosing the Right Location
Assessing the Space
Before you start building your DIY fire pit, it’s important to assess the available space in your backyard. Consider the size and shape of the area and ensure that it is suitable for a fire pit. Look for an open space with enough clearance from any surrounding structures or vegetation. Additionally, take into account factors such as wind direction and nearby seating options to ensure the most enjoyable experience for everyone.
Consider Safety Precautions
Safety should be your top priority when choosing a location for your fire pit. Make sure there are no overhanging branches or power lines that could pose a risk. Keep the fire pit at a safe distance from any flammable materials, such as plants, fences, or structures. It’s also a good idea to place your fire pit on a non-flammable surface, like stones or bricks, to prevent accidental fires.
Checking Local Regulations
Before you start building your fire pit, it’s essential to check local regulations and fire codes in your area. Some municipalities may have specific rules regarding fire pit sizes, setback distances, or even outright bans on open fires. Contact your local fire department or municipality to ensure that you are in compliance with all the necessary regulations. Doing so will not only ensure your safety but also prevent any potential legal issues in the future.
Materials and Tools Needed
Selecting the Fire Pit Design
When it comes to choosing a fire pit design, the possibilities are endless. You can opt for a traditional round pit, a square or rectangular shape, or even get creative with unique designs. Consider your personal preferences and the overall aesthetic of your backyard when selecting a design. Think about how you plan to use the fire pit and whether you want it to be the focal point of your outdoor space or blend in seamlessly with the surroundings.
Choosing the Right Materials
Selecting the right materials for your fire pit is crucial to ensure its durability and longevity. Common materials used for fire pits include stone, brick, concrete, and metal. Each material has its own pros and cons in terms of aesthetics, heat resistance, and maintenance requirements. Take into consideration factors such as weather conditions in your area and the overall style you want to achieve. Regardless of the material you choose, make sure it is heat-resistant and can withstand high temperatures.
Gathering the Necessary Tools
Before you begin construction, gather all the necessary tools to make the process smoother and more efficient. Some essential tools you may need include a shovel, wheelbarrow, level, tape measure, stakes, string, masonry saw, masonry trowel, bubble level, and a mallet. Having these tools on hand will ensure that you can complete each step of the construction process with ease and precision.
Preparing the Area
Clearing the Space
Once you have chosen the location for your fire pit, it’s time to clear the area. Remove any debris, plants, or grass from the designated spot to create a clean and even surface. Use a rake or shovel to clear the space thoroughly, ensuring that there are no obstacles that could interfere with the construction process or pose a safety hazard.
Leveling the Ground
Next, it’s important to level the ground where your fire pit will be constructed. Use a shovel or rake to remove any excess soil or bumps that may be present. The ground should be as level as possible to ensure the stability and structural integrity of the fire pit. Take your time during this step to ensure that the ground is properly leveled, as any unevenness may cause issues during subsequent stages of construction.
Marking the Fire Pit Circumference
Once the ground is cleared and leveled, mark the circumference of your fire pit using stakes and string. This will serve as a guide for the construction process, helping you maintain the desired shape and size. Carefully measure and mark the desired dimensions of the fire pit, ensuring that it is centered and symmetrical within the designated area. Take your time during this step to ensure that the markings are accurate, as they will determine the final outcome of your fire pit.
Constructing the Fire Pit Base
Digging the Trench
With the area prepared and marked, it’s time to start digging the trench for the fire pit base. Use a shovel or a trenching tool to dig a trench approximately 8-12 inches deep within the marked circumference. Make sure the trench is even and follows the shape you have marked. Take care to remove any excess soil from the trench as you dig, creating a clean and stable foundation for your fire pit.
Laying the Base Layer
Once the trench is dug, it’s time to lay the base layer of your fire pit. Start by adding a 2-3 inch layer of gravel or crushed stone to the bottom of the trench. This layer will help with drainage and prevent the base from shifting. Use a rake or a shovel to level the gravel evenly, ensuring a solid and stable base for the fire pit.
Building the Inner Wall
After the base layer is in place, it’s time to build the inner wall of your fire pit. This wall will help contain the fire and create a boundary between the flames and the surrounding area. Use fire-resistant bricks or stones to stack them in a circular or rectangular pattern, depending on the shape of your fire pit. Apply a layer of mortar between each brick or stone to ensure a strong and stable wall. Use a level to ensure that the wall is vertical and even all around, making adjustments as necessary.
Building the Fire Pit Walls
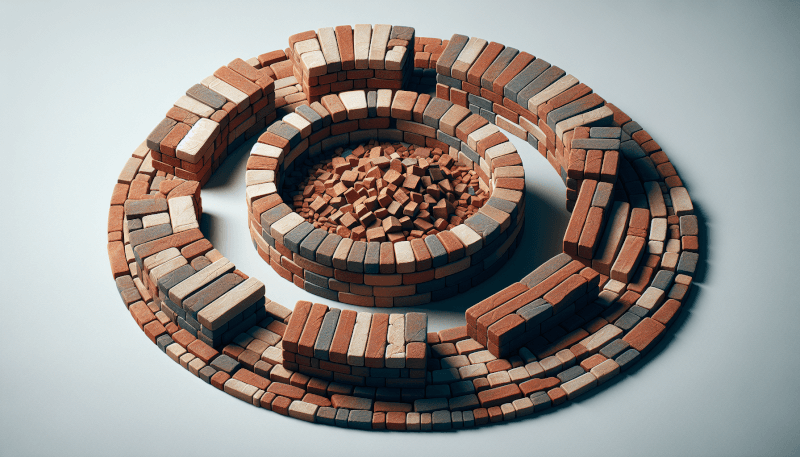
Arranging the Bricks or Stones
With the inner wall in place, it’s time to start building the outer walls of your fire pit. Arrange the bricks or stones to create the desired shape and size, stacking them tightly together. You can opt for a single layer of bricks/stones or multiple layers, depending on the height you want for your fire pit. Experiment with different patterns and designs to create a unique and visually appealing structure.
Securing the Wall Structure
To ensure the stability and longevity of your fire pit, it’s important to secure the wall structure. Apply mortar between each layer of bricks or stones, pressing them firmly together. Use a masonry trowel to smooth the mortar and remove any excess. This will strengthen the bond between the bricks or stones, creating a solid and secure fire pit structure.
Creating Ventilation Openings
Proper ventilation is essential for a fire pit to burn efficiently. To create ventilation openings, leave small gaps or spaces between the bricks or stones at the bottom of the fire pit wall. These openings will allow air to flow into the fire pit, promoting better combustion and reducing the risk of excessive smoke. Ensure that the gaps are evenly distributed and large enough to provide adequate airflow without compromising the structural integrity of the fire pit.
Installing the Fire Pit Liner
Placing the Liner at the Bottom
A fire pit liner provides an additional layer of protection and insulation for your fire pit. Place the liner at the bottom of the fire pit, ensuring that it covers the entire area. The liner can be made of fire-resistant materials such as metal or fire bricks. This layer will protect the base and walls of the fire pit from excessive heat and prevent damage over time.
Securing the Liner in Place
Once the liner is in place, secure it by stacking bricks or stones on the edges. This will hold the liner in position and ensure that it does not shift during use. Take care to place the bricks or stones securely, allowing for proper drainage and ventilation around the liner. The liner should fit snugly within the fire pit, providing an additional layer of protection against heat and moisture.
Insulating the Fire Pit
To improve the overall efficiency and heat retention of your fire pit, consider insulating the walls. Apply a layer of insulating fire bricks or refractory mortar to the inner surface of the fire pit walls. This insulation layer will help minimize heat loss, allowing your fire pit to generate and maintain high temperatures for a longer period. Insulation also reduces the risk of the outer surface becoming hot, making it safer for everyone to gather around the fire pit.
Adding the Fire Pit Grate
Choosing the Right Grate
A fire pit grate plays a crucial role in keeping the fire elevated and ensuring proper airflow. When selecting a grate, consider the size, material, and design. Opt for a grate that fits the dimensions of your fire pit and can withstand high temperatures without warping or deteriorating. Cast iron grates are a popular choice due to their durability and heat resistance. Look for grates with evenly spaced bars to support the firewood and allow air to circulate effectively.
Installing the Grate
Once you have chosen the right grate, it’s time to install it in your fire pit. Place the grate on top of the fire pit base, ensuring that it rests securely. Adjust the positioning as necessary to achieve proper airflow and stability. The grate should be positioned high enough to allow ash to fall through and prevent excessive heat transfer to the base and surrounding areas.
Ensuring Proper Airflow
Good airflow is essential for a well-burning fire. Make sure there is enough space between the grate and the walls of the fire pit for air to circulate freely. This will promote better combustion and prevent the fire from smoldering. Periodically clean the grate and remove any ash buildup to maintain proper airflow and ensure the longevity of your fire pit.
Decorative Finishing Touches
Applying a Protective Finish
After the construction of your fire pit is complete, consider applying a protective finish to enhance its durability and appearance. Depending on the materials used, you may choose to seal or paint the exterior of your fire pit. A high-temperature paint or sealant can protect the surface from weathering and prolong its lifespan. Additionally, a protective coating can add a touch of color and style to complement your backyard decor.
Adding a Stone Surround
To further enhance the aesthetics of your fire pit, consider adding a stone surround. Stack stones or bricks around the base of the fire pit to create a decorative border. This will provide a seamless transition between the fire pit and the surrounding area, adding a touch of elegance to your outdoor space. Take care to choose stones or bricks that match or complement the design of your fire pit for a cohesive look.
Incorporating Seating Options
To complete the cozy atmosphere around your fire pit, incorporate seating options for you and your guests. Arrange chairs, benches, or even built-in seating around the fire pit to create a comfortable area for relaxation and socializing. Consider the size and layout of your backyard when choosing seating options, ensuring that there is enough space for everyone to enjoy the warmth and ambiance of the fire pit.
Fire Pit Safety Measures
Maintaining Clearances
Safety should always be a priority when enjoying a fire pit in your backyard. It’s essential to maintain proper clearances between the fire pit and any flammable materials. Clear a minimum distance of 10 feet (check local regulations for specific requirements) between the fire pit and structures, plants, trees, or fences. Be mindful of overhanging branches that could potentially catch fire. Also, ensure that the fire pit is positioned on a non-flammable surface, such as stone or brick, to prevent accidental fires.
Implementing Safety Guidelines
When using your DIY fire pit, it’s important to follow safety guidelines to prevent accidents and injuries. Place a fire extinguisher or bucket of water nearby for quick access in case of emergency. Never leave the fire unattended and keep a close eye on children and pets around the fire pit. Avoid using flammable liquids to ignite the fire and only burn dry, seasoned firewood to minimize excessive smoke. Always extinguish the fire completely before leaving the area or going to bed.
Storing Fire Pit Accessories
When the fire pit is not in use, it’s important to properly store the associated accessories to prevent damage and ensure their longevity. Clean the grate, tools, and other accessories and store them in a dry and secure location. Consider using a weather-resistant container or storage shed to protect these items from the elements. By maintaining your fire pit and accessories properly, you can enjoy many years of safe and memorable outdoor gatherings.
Enjoying Your DIY Fire Pit
Cheers and Celebrations
Now that you have successfully built your own DIY fire pit, it’s time to celebrate your accomplishment! Invite your friends and family over and gather around the warm glow of the fire pit. Raise your glasses, toast to your hard work, and enjoy the cozy atmosphere together. Remember to always practice responsible fire pit use and ensure the safety and comfort of your guests.
Fire Pit Cookouts and S’mores
One of the great joys of having a fire pit in your backyard is the opportunity to cook delicious meals and snacks over an open flame. Arrange a cookout and grill your favorite meats, vegetables, or even roast marshmallows for s’mores. The smoky flavor adds a special touch to your culinary creations, and the experience of cooking outdoors brings a sense of adventure and camaraderie. Gather your loved ones and indulge in the delightful taste of food prepared over your DIY fire pit.
Creating a Cozy Ambience
Beyond the practical aspects of warmth and cooking, a fire pit also adds a cozy and inviting ambiance to your outdoor space. Arrange comfortable seating, add soft cushions, blankets, and ambient lighting to create a relaxing atmosphere. Enjoy intimate conversations, storytelling, or simply unwind after a long day as the crackling fire casts a warm glow. Whether you’re entertaining guests or seeking solace in your backyard retreat, your DIY fire pit will undoubtedly become the centerpiece of countless memorable moments.
By following these steps and incorporating your own personal touches, you can create a DIY fire pit that not only adds practicality and warmth to your backyard but also becomes a cherished gathering place for friends and family. So grab your tools, put on your creative hat, and embark on this exciting journey of building your very own fire pit. With careful planning, attention to safety, and a touch of creativity, you’ll soon be enjoying the flickering flames and the cozy ambiance of your DIY fire pit creation.
